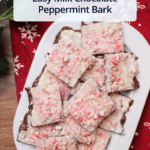
Easy Milk Chocolate Peppermint Bark
This post may contain affiliate links. We only promote products we actually use and truly love!
This 3-ingredient milk chocolate peppermint bark recipe is as easy as it is delicious! It’s the perfect treat for the holiday season, whether you’re hosting a Christmas party or looking to share a tasty gift with friends and neighbors. It’s made without peppermint extract, so all you need is chocolate and candy canes.

I’ve always been a big fan of chocolate and mint, so peppermint bark is one of my favorite Christmas desserts – along with white chocolate peppermint fudge! The flavor reminds me of drinking hot cocoa with a candy cane stuck in it, something I always enjoy this time of year.
Speaking of hot chocolate, you might want to check out our hot chocolate dip, another easy 3 ingredient treat we love in the winter!
What To Expect
We hope you love this recipe!
If you give it a try, please let us know what you think by leaving a rating and review. We read and reply to every single comment!
Why We Love This Recipe
Peppermint bark is such a classic holiday treat. I love being able to make it myself in just 15 minutes, and then have plenty to share with friends and family!
– Nicole
Ingredients

- Milk and white chocolate chips – We recommend using chocolate chips instead of chocolate melting wafers for this recipe. Chocolate chips have stabilizers in them that help them hold their shape, so they’ll actually be slightly resistant to melting – which is great for this recipe! The chocolate will be thick and not too runny when it’s melted, so that you can easily spread it into a thin rectangle no matter the size of your baking sheet. It also helps prevent the two layers of chocolate from melting into one another, so you can easily add the white chocolate layer without having to wait for the milk chocolate to fully set.
- Crushed candy canes – You can typically find a bag of crushed candy canes in the baking or holiday aisle of the grocery store, especially around Christmas time. But if you have trouble finding it, you can easily crush them yourself with a food processor. Just break up whole candy canes (or minis) into pieces that can fit in your food processor, then pulse until you get a mix of candy cane dust and small chunks.
How To Make Easy Milk Chocolate Peppermint Bark: Step-by-Step Guide
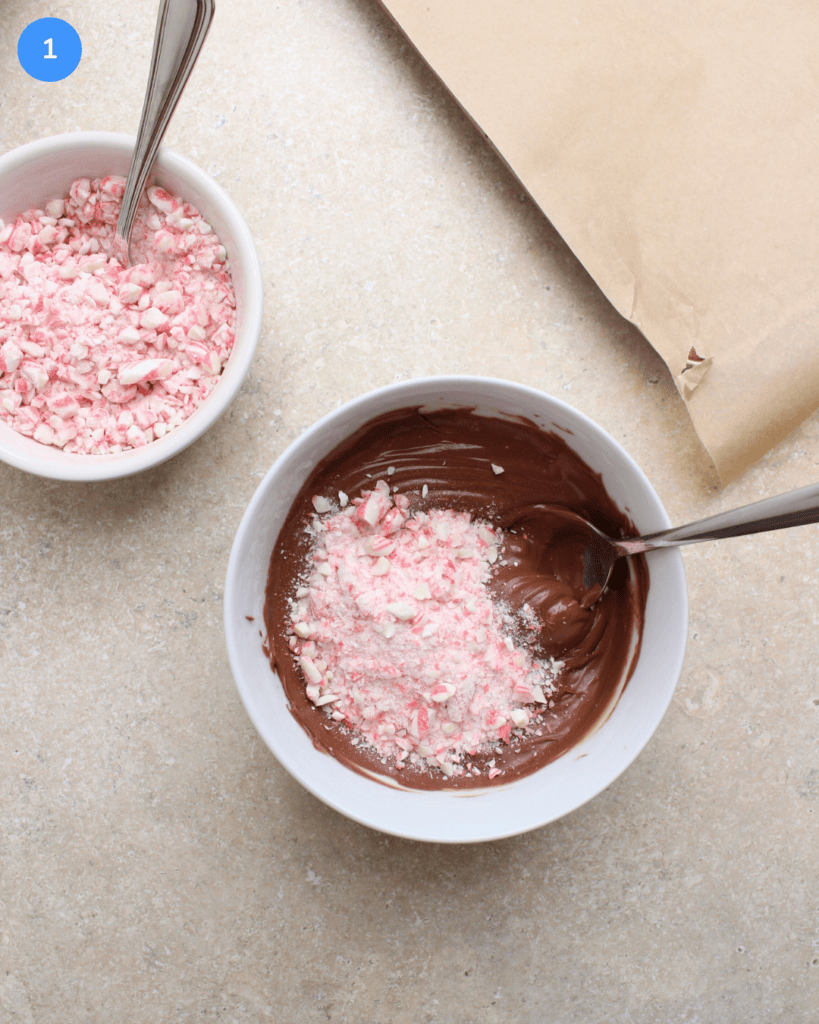
Step 1: Melt the milk chocolate chips in the microwave for about 60 to 90 seconds, stirring every 15 to 20 seconds to ensure even melting. Once the milk chocolate is fully melted, stir in about one-third of the crushed candy canes.
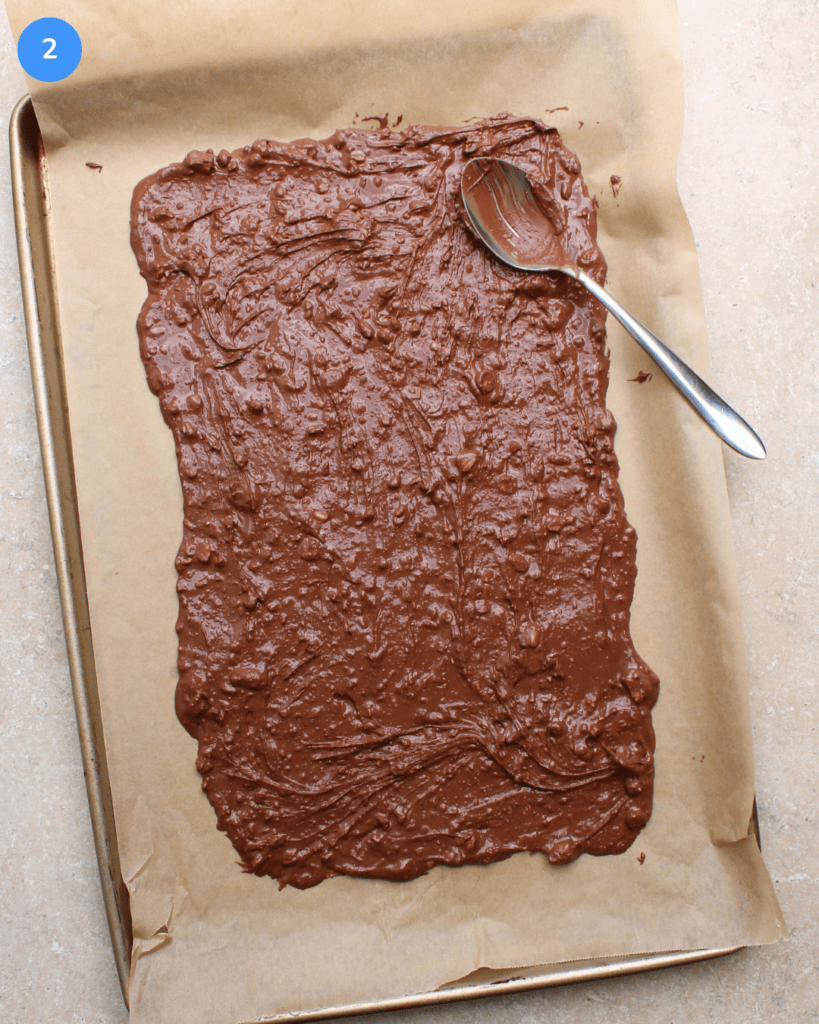
Step 2: Spread the chocolate onto a parchment-lined baking sheet into a roughly 8 by 13 inch rectangle, about a quarter inch thick. You can use the back of a large spoon or an offset spreader for this.
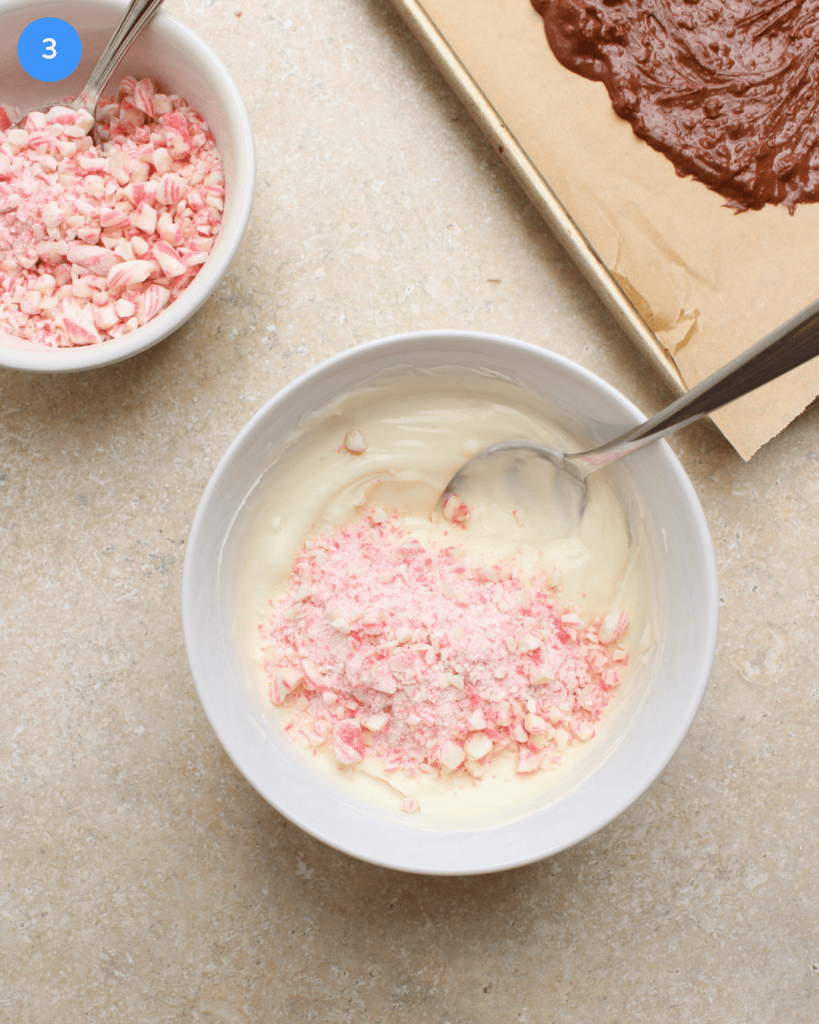
Step 3: Next, repeat step 1 with the white chocolate chips. Melt the chocolate in the microwave (stir every 15 to 20 seconds), then mix in about one-third of the crushed candy canes.
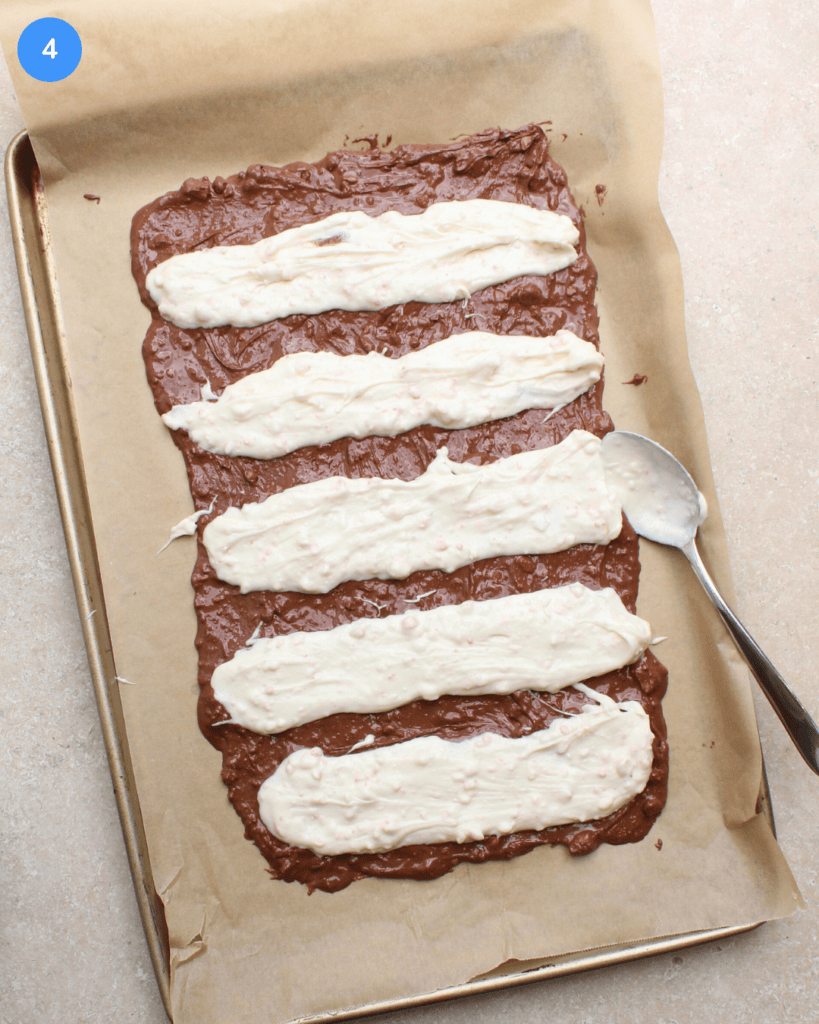
Step 4: Spoon the white chocolate into thick lines on top of the milk chocolate. Try to make them an even thickness so that it’s easier to spread evenly in the next step.

Step 5: Now, drag the tines of a fork lengthwise across the peppermint bark, so that the white chocolate gets spread across the whole layer of milk chocolate. We find that this is the easiest way to spread out the white chocolate without disturbing the layer of milk chocolate underneath, since you can use fairly light pressure with a fork.

Step 6: Finally, sprinkle the remaining crushed candy canes on top of the white chocolate.
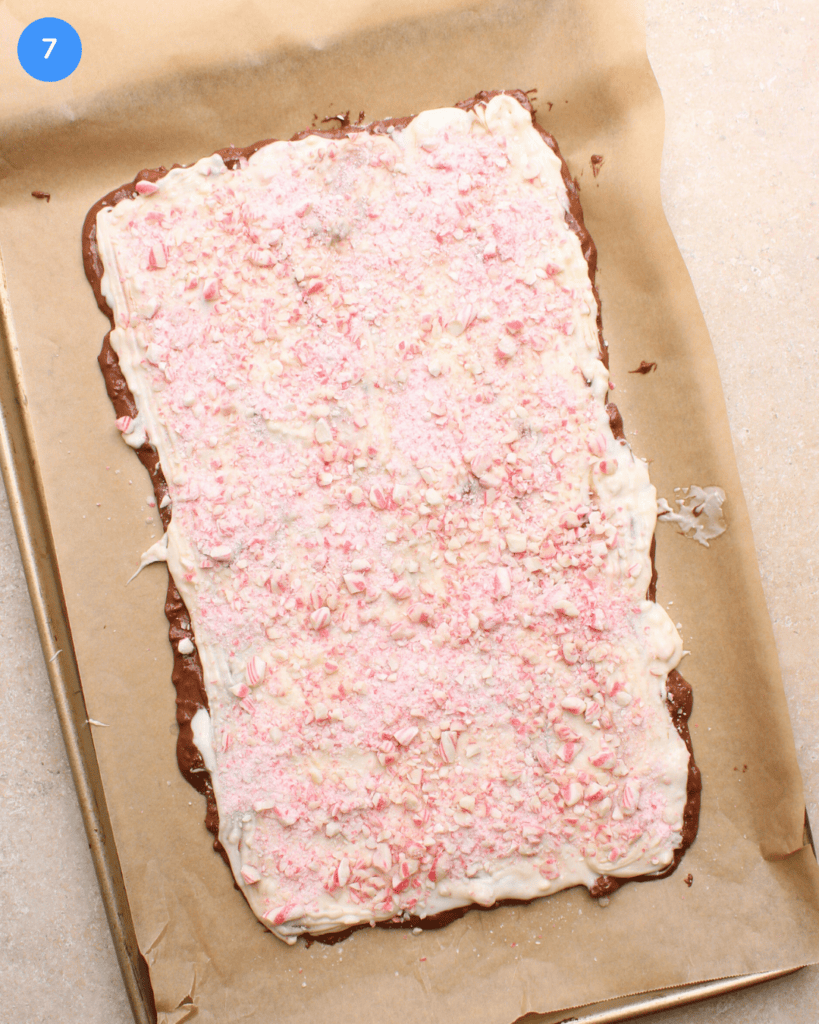
Step 7: Allow to set at room temperature for at least 2 hours before slicing.
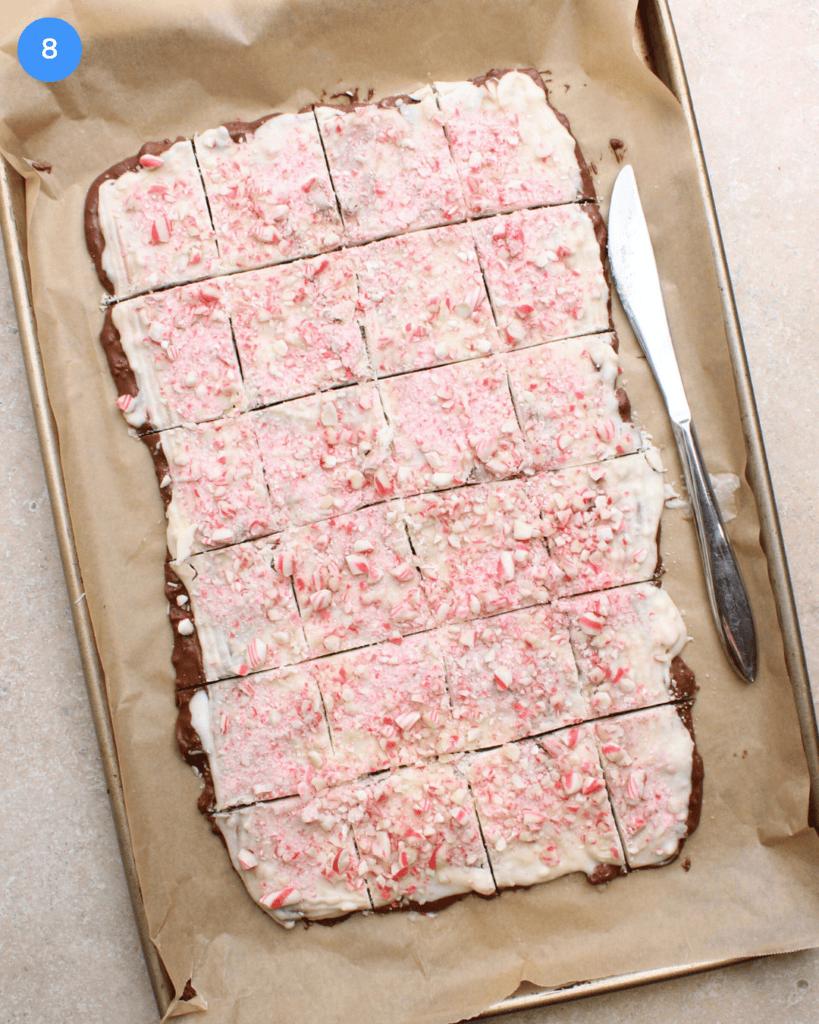
Step 8: To slice, use a warm butter knife (run it under hot water for 10 to 15 seconds, then dry it off) and cut into roughly 2 by 2 inch squares. Optionally continue to set the bark in the fridge if it’s too sticky and warm; how well it sets will depend on the ambient temperature of your kitchen.
Expert Tips

Peppermint Bark FAQs
Featured by Twinkl in their White Christmas Recipe Ideas Blog.
Related Christmas Dessert Recipes
Love this recipe? You may enjoy these recipes, too:


Tell us what you think!
We hope you enjoy this recipe! When you try it out, please leave a review and a star rating in the comments below. Happy cooking! – Nicole and Alex
FREE EMAIL GUIDE
Classic Comfort Foods Made Easy
Learn the 4 tips & tricks we use in our kitchen every day to make delicious meals, stress-free.
Follow us on social:

Easy Milk Chocolate Peppermint Bark Recipe
Save this recipe!
Equipment
Ingredients
- 10 ounces milk chocolate chips
- 10 ounces white chocolate chips
- 8 ounces crushed candy canes
Instructions
- Line a large baking sheet with parchment paper.
- Melt the milk chocolate in the microwave for about 60 to 90 seconds, stirring every 15 to 20 seconds. Stir about one-third of the crushed candy canes into the chocolate, then spread it onto the baking sheet into a roughly 8 by 13 inch rectangle, about a quarter inch thick.
- Melt the white chocolate in the microwave for about 60 to 90 seconds, stirring every 15 to 20 seconds. Stir about one-third of the crushed candy canes into the chocolate, then spoon the mixture into thick lines on top of the milk chocolate, parallel to the short side of the rectangle. Try to make them an even thickness so that it’s easier to spread evenly in the next step.
- Drag the tines of a fork lengthwise across the peppermint bark, so that the white chocolate gets spread across the whole layer of milk chocolate. We find that this is the easiest way to spread out the white chocolate without disturbing the layer of milk chocolate underneath, since you can use fairly light pressure with a fork.
- Sprinkle the remaining crushed candy canes on top of the white chocolate layer, then allow the peppermint bark to set at room temperature for at least 2 hours.
- To slice, use a warm butter knife (run it under hot water for 10 to 15 seconds, then dry it off) and cut into roughly 2 by 2 inch squares. Optionally continue to set the bark in the fridge if it’s too sticky and warm; how well it sets will depend on the ambient temperature of your kitchen.
Notes
Nutrition
If you have any questions regarding the information presented in this post, please refer to our Nutrition Disclaimer here.
FREE EMAIL GUIDE
Classic Comfort Foods Made Easy
Learn the 4 tips & tricks we use in our kitchen every day to make delicious meals, stress-free.
This recipe is so easy! I love making this around Christmastime to share with my loved ones.