Hot Honey Pepperoni Pizza with Ricotta

This post may contain affiliate links. We only promote products we actually use and truly love!
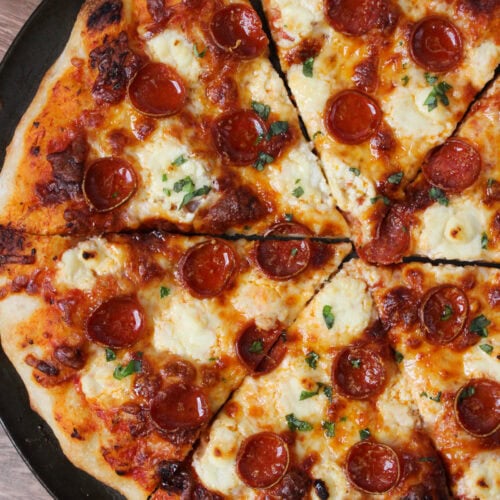
An upgraded version of hot honey pepperoni pizza topped with dollops of creamy ricotta that comes together in just 25 minutes for a fun, easy date night dinner at home any night of the week.
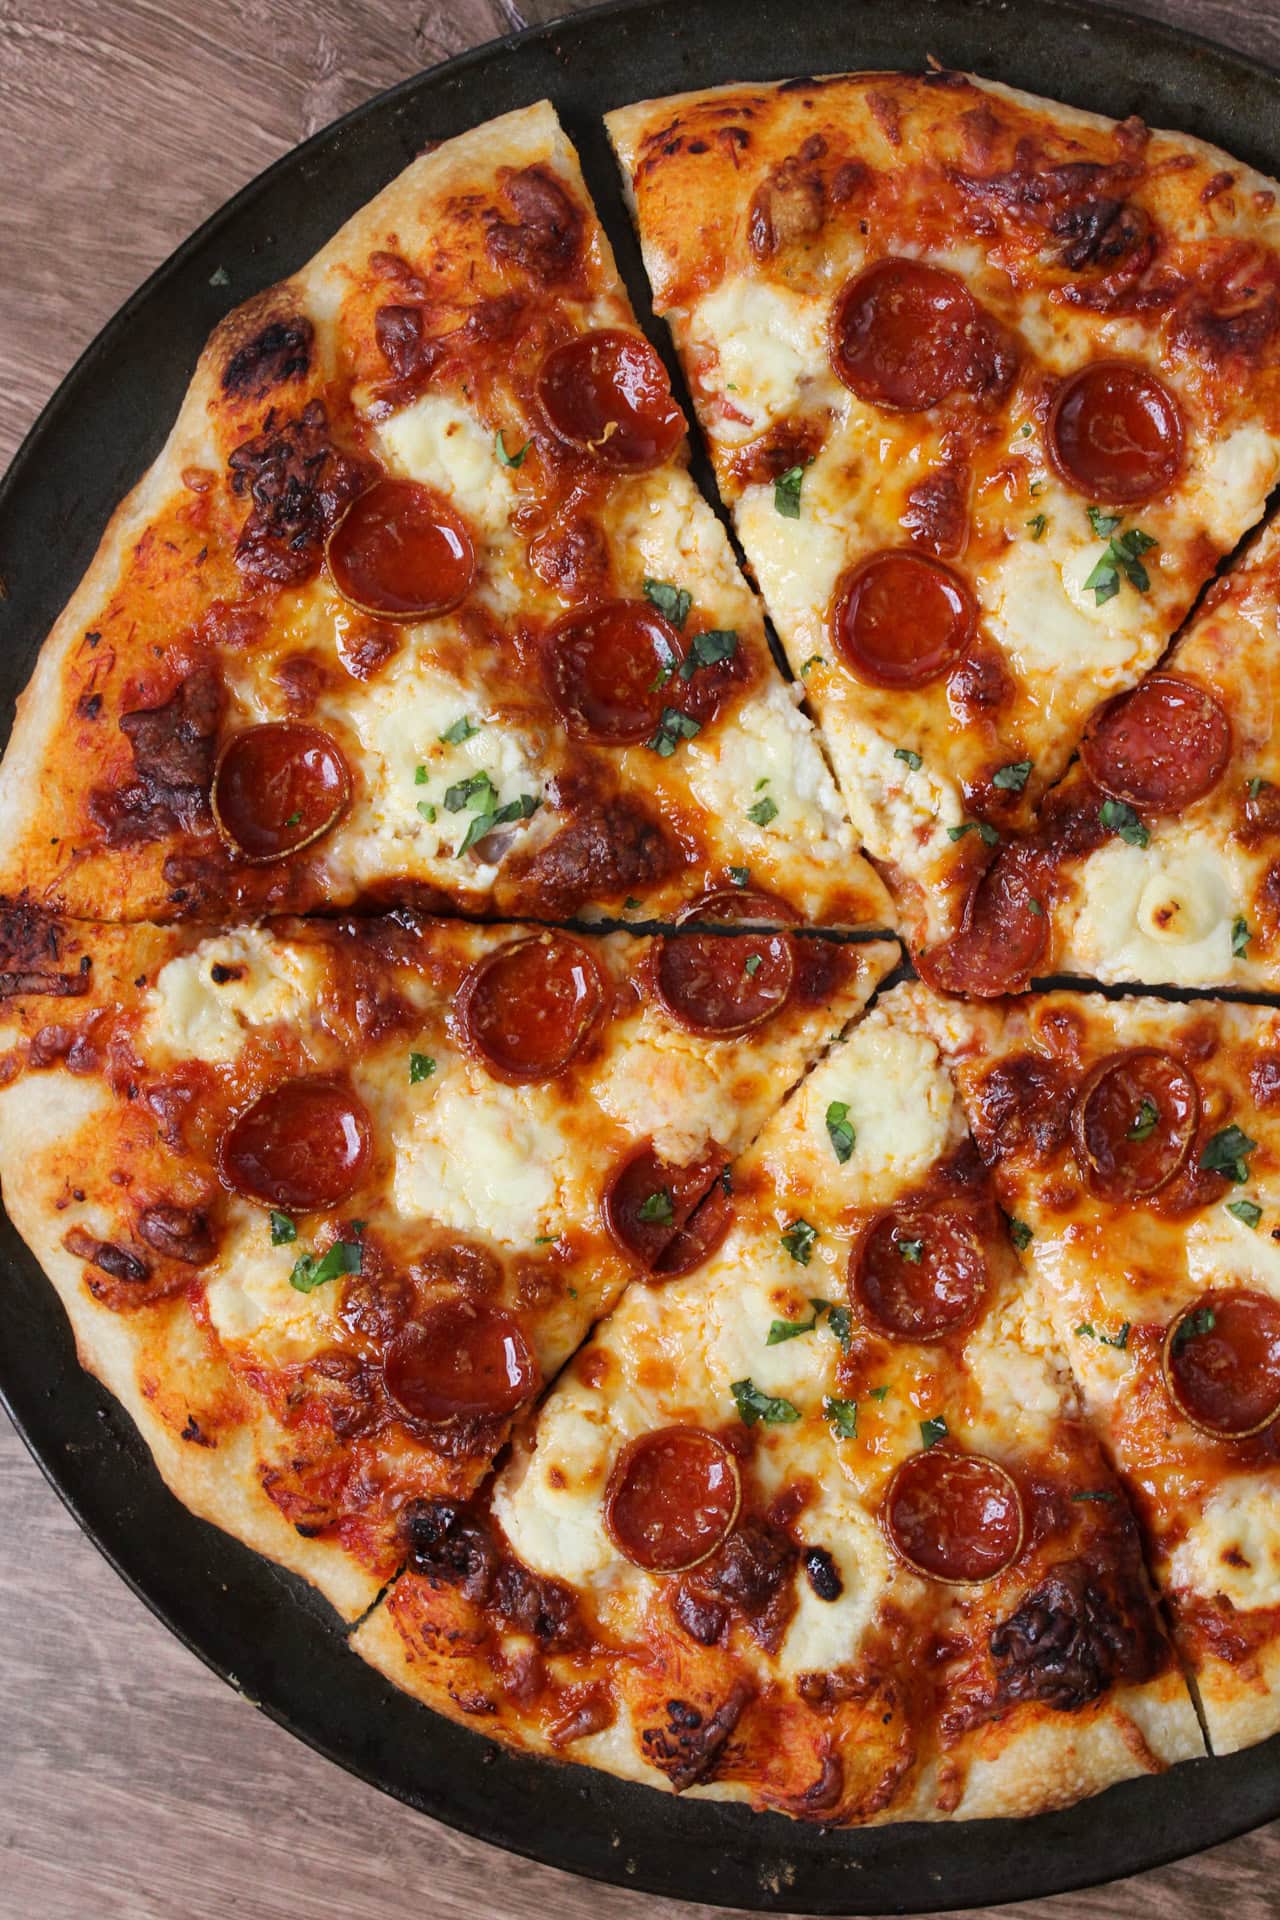
If you’ve never tried ricotta or hot honey on pizza before, this is your sign. We first experienced this irresistible flavor combo about a year ago at a brewery in Carmel-by-the-Sea, and it was so good we haven’t stopped thinking about it since! Which is why we made our own decadent version of a hot honey pepperoni pizza with ricotta – now we can have it any time we want!
You might be asking yourself, is ricotta or hot honey actually good on pepperoni pizza? Absolutely! These two ingredients are one of the best ways to upgrade a classic pepperoni pizza, in our opinion. The fluffy texture and sweet flavor of the ricotta adds a nice contrast to the salty, greasy pepperoni, while the hot honey gives the whole pizza a little extra zing. Balanced out with fresh basil, these simple ingredients add a new layer of depth to a regular old pepperoni pizza.
When you make it with our fluffy homemade pizza dough, you’ll think you’re eating takeout from your favorite local pizza joint. It’s that good. Try this jazzed up pepperoni pizza next time you’re feeling adventurous in the kitchen (or for an at home date night when you want to impress your SO) and indulge!
What To Expect
Summarize and save this content on:
AI can make mistakes. Don’t trust everything it says.
Why We Love This Recipe
Fancy pizzas are probably our favorite date night dinner at home. Being able to work together to create a decadent, flavor packed, upscale pizza and then enjoy every bite of it with my best friend by my side is what I call a perfect night.
– Alex
Ricotta and Hot Honey Pepperoni Pizza Ingredients
This restaurant style pizza recipe is basically an upgraded version of a classic pepperoni pizza with tomato sauce, featuring delicious ricotta and hot honey. Here’s everything you’ll need to make this pizza at home:
- Pizza dough – There are so many types of pizza crusts out there (thin crust, thick crust, Neapolitan, etc.). We like to make homemade dough so that we can select the appropriate type of crust for the pizza style we want. For this jazzed up pepperoni pizza, we adapted this thin crust New York style dough recipe to yield the perfect crispy on the outside, fluffy on the inside crust. Of course you can also use store-bought dough as well.
- Pizza sauce – We also love making this easy homemade pizza sauce since the flavor is so much more authentic than any store brand we’ve tried. But again, you can use store bought if you want to make things even easier.
- Cheese – This pizza features 3 types of cheese – mozzarella, parmesan, and ricotta. The salty parmesan helps to balance out the sweetness of the ricotta, so definitely don’t skip this ingredient!
- Pepperoni – Our go to brand of pepperoni is Hormel. We find that it tastes the best and crisps up nicely.
- Hot honey – You can use your favorite store-bought brand, or make your own hot honey at home. We prefer the taste of homemade hot honey and it’s so easy to make, so we always go that route. Plus, it’s often cheaper!
- Fresh basil – Basil is a bright and fresh addition to the pizza that helps balance some of the heavier and sweeter flavors like ricotta. Don’t skip this ingredient!
How To Make Pepperoni Pizza with Ricotta and Hot Honey
Making our pepperoni pizza with ricotta and hot honey is a 2 day process, if you want to make the dough from scratch (which we highly recommend!). Every step is broken down below, from preparing the dough to stretching it, assembling the pizza, and baking.
If you’re going to simplify this recipe and use store bought dough, skip to Step Two: Assembling and Baking.
Step One: Pizza Dough
- Plan ahead – This pizza dough needs to be made 1 to 2 days ahead of time.
- Autolyse – Gently combine warm water and bread flour in a large mixing bowl, then let it sit for about 20 to 30 minutes. This is known as the autolyse technique, which kickstarts the gluten formation process and yields a more flavorful dough.
- Make the dough – Add the yeast, sugar, salt, and olive oil to the dough and mix until well combined, either using your hands (wet them first to help prevent sticking) or with the paddle attachment of a stand mixer. Let the dough rest for another 30 minutes.
- Knead – Knead the dough in a stand mixer with the dough hook attachment for about 10 minutes, until it’s roughly shaped into a ball. You may have to coax the dough off the hook every few minutes (turn the stand mixer off first!) if it gets stuck.
- Shape – Roughly shape the dough into a ball. Coat the inside of another bowl with olive oil, then transfer the dough to this bowl and roll it around so the dough ball gets coated in the oil. Cover the bowl tightly with plastic wrap and refrigerate for 24 to 48 hours.
This pizza dough will be slightly sticky – it has a higher hydration level (meaning a greater ratio of water to flour) than you might be used to seeing from store bought dough. Wet your hands before working with it to help prevent sticking.
Step Two: Assembling and Baking
- Prep the dough – Remove the pizza dough from the fridge about an hour before you want to make the pizza so it can warm up to room temperature. In the meantime, preheat the oven to 500 degrees F.
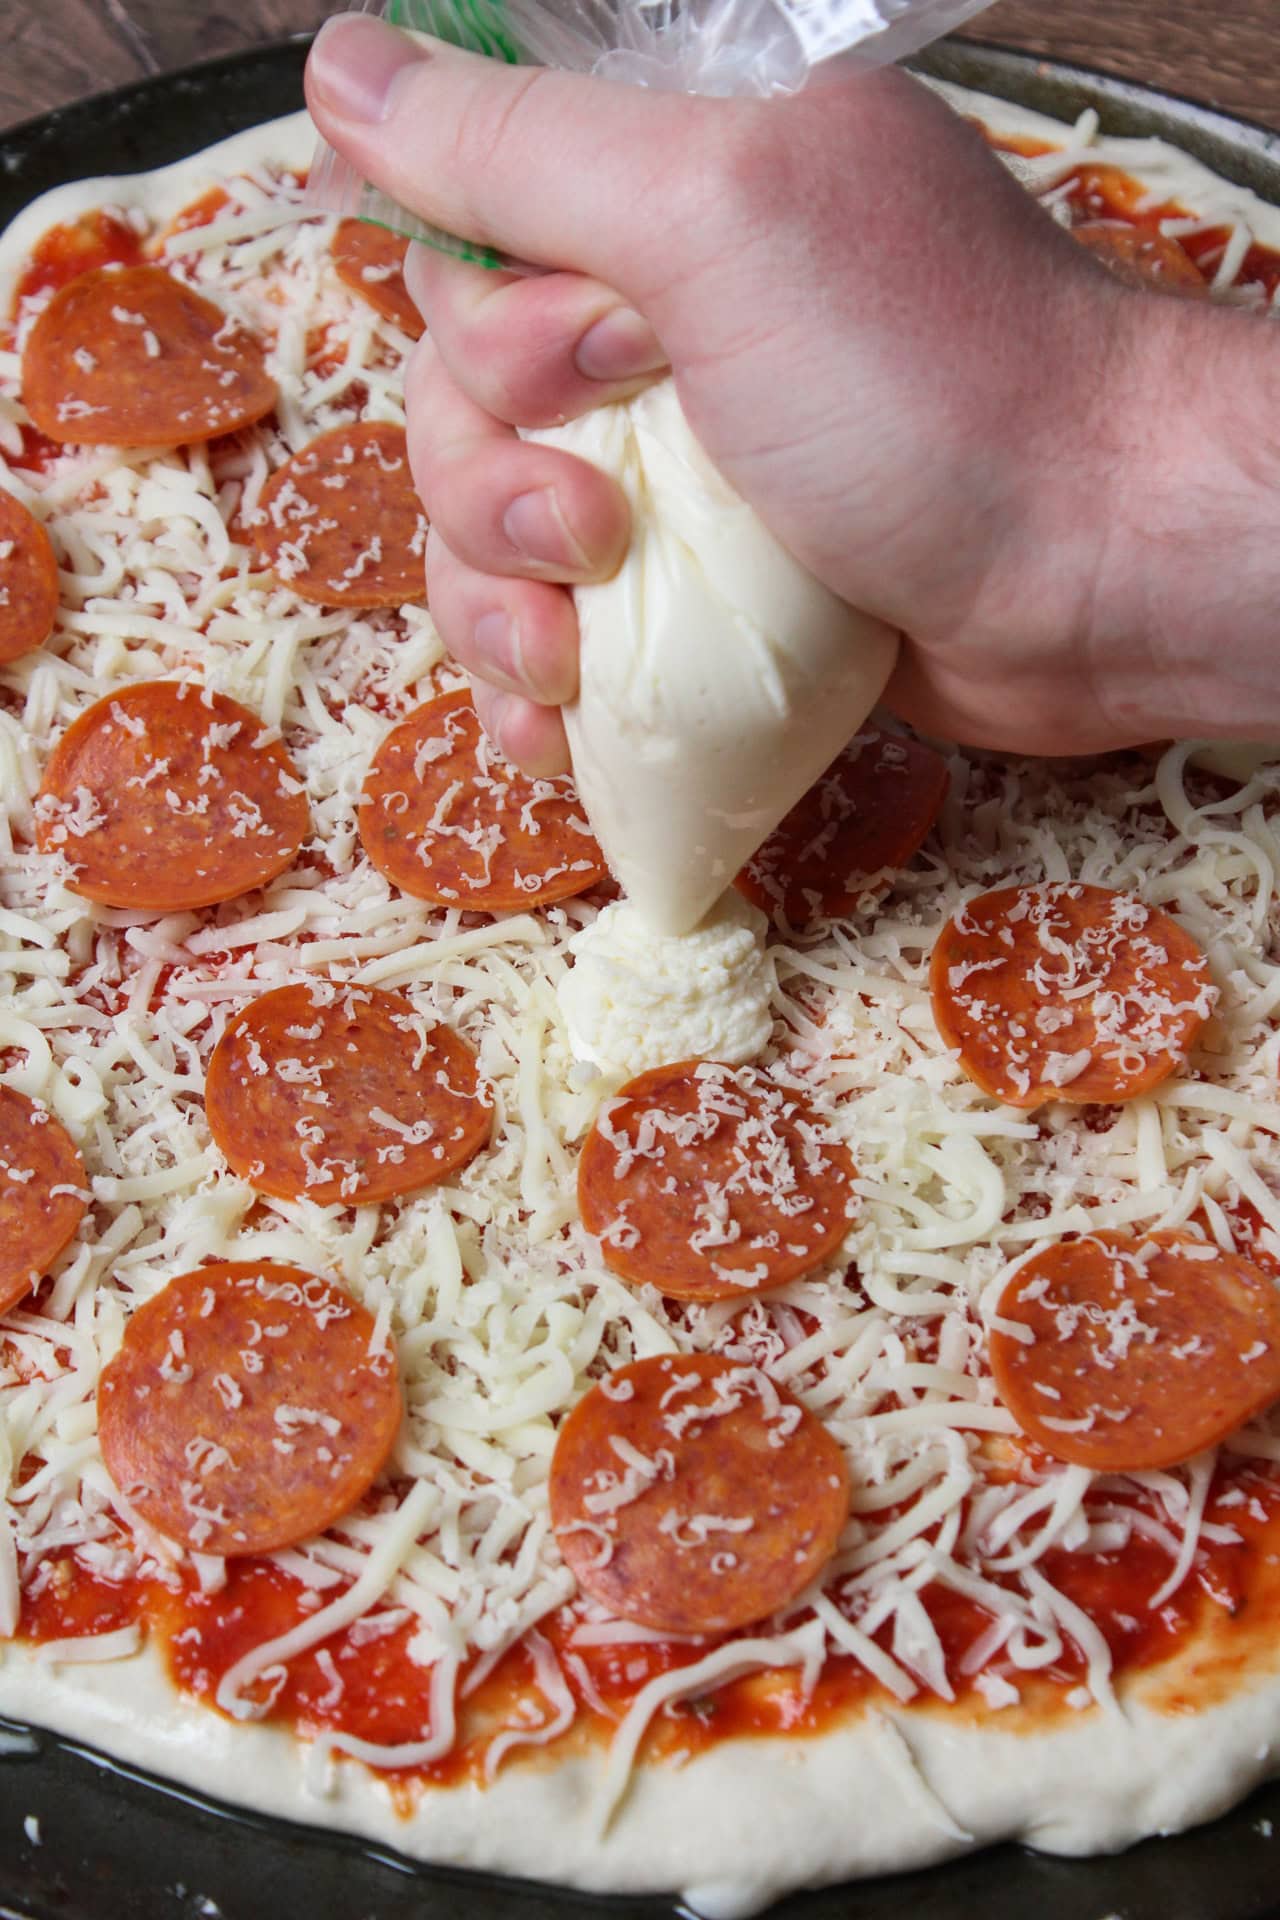
- Prep the toppings – If you want to make hot honey from scratch, do that now. Then, make a piping bag for the ricotta. Fill a small plastic bag with the ricotta, pushing it down towards one corner of the bag. Then, twist the opposite corner to lightly seal the cheese in the bag. Using a pair of kitchen shears, snip about a quarter inch off of the corner of the bag with the cheese so that you can pipe the ricotta out onto the pizza.
- Stretch the dough – Generously flour a clean work surface and your hands, and lightly dust the pizza pan and the top surface of the dough with flour. Carefully pick the dough up out of its bowl and transfer it to the work surface. Now, slowly and gently use your fingers to spread the dough out into a circular shape on the work surface – be careful so as not to pop any of the air bubbles trapped in the dough. Since this dough has a higher hydration level, it will want to spread out naturally, so shaping should be fairly easy. Then, transfer the dough onto the prepared pan and gently finish shaping it into a 12 to 14 inch round to fill the pan.
- Assemble the pizza – Top the dough with an even layer of pizza sauce, leaving about a quarter- to a half-inch of space around the edges for the crust. Sprinkle evenly with mozzarella cheese, add the pepperoni, then sprinkle with grated parmesan and a pinch of salt. Then, pipe the ricotta into small dollops (about a half-inch tall) spaced out evenly across the pizza.
- Bake – Bake for about 10 to 15 minutes, until the mozzarella is bubbly and browned and the ricotta is lightly browned on top.
- Chop the basil – While the pizza is in the oven, finely chop a few fresh basil leaves for finishing the pizza. You don’t want to do this step too early, as the basil will oxidize (turn brown) the longer it sits after chopping.
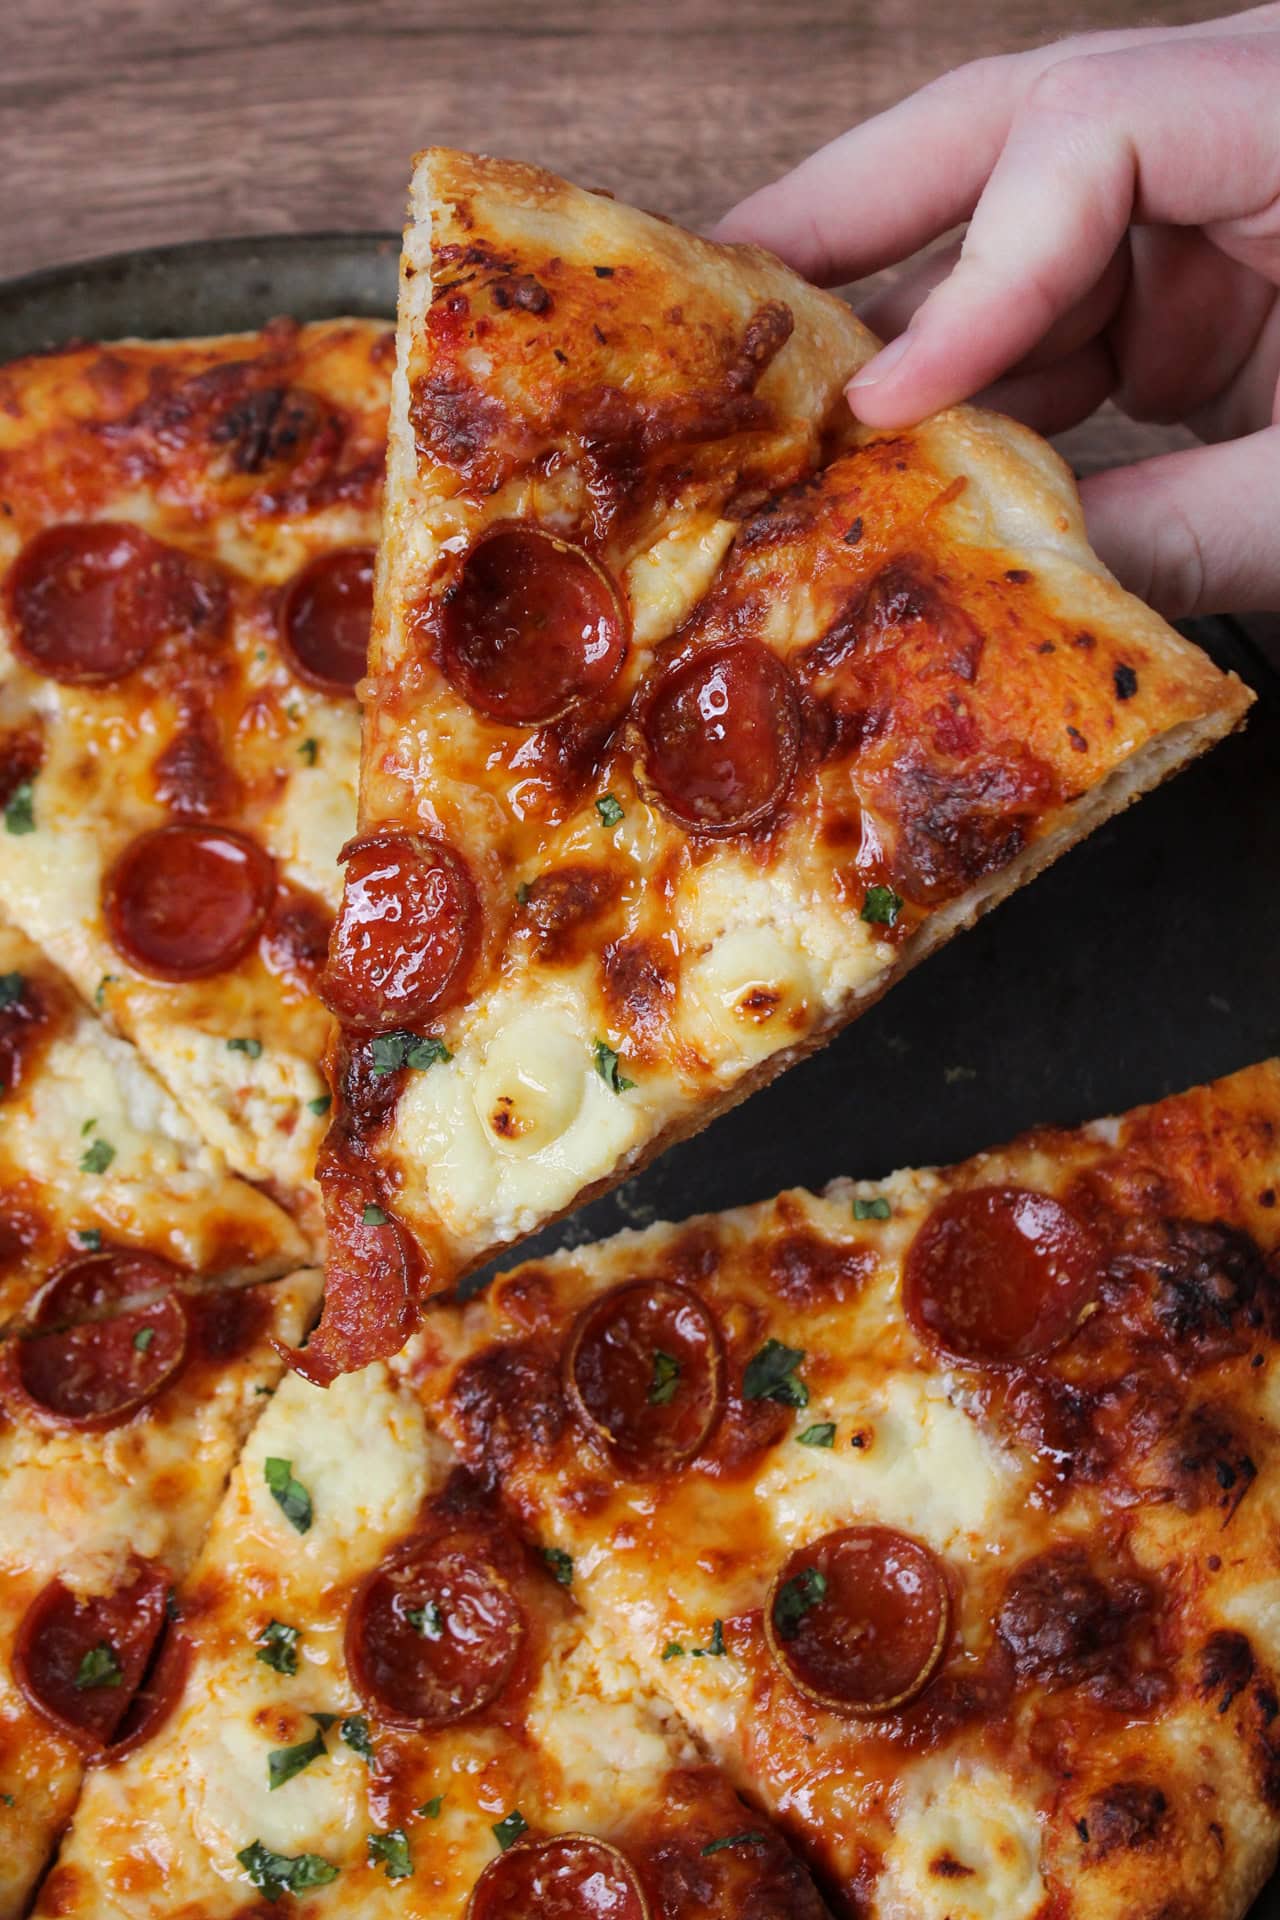
- Finishing touches – Finally, top the pizza with a drizzle of hot honey and the fresh basil. Slice and serve hot!
Expert Tips
Storing and Reheating Leftovers
This pizza is so good, we can almost guarantee you won’t have any leftovers. But in case you do, know that you can store and reheat this pizza just like any other leftover pepperoni pizza!
Wrap leftover pizza slices in aluminum foil (or put them in a food storage container) and keep in the fridge for up to 5 days. Reheat in the oven at 350 degrees F for about 10 minutes.
Why You’ll Love This Recipe
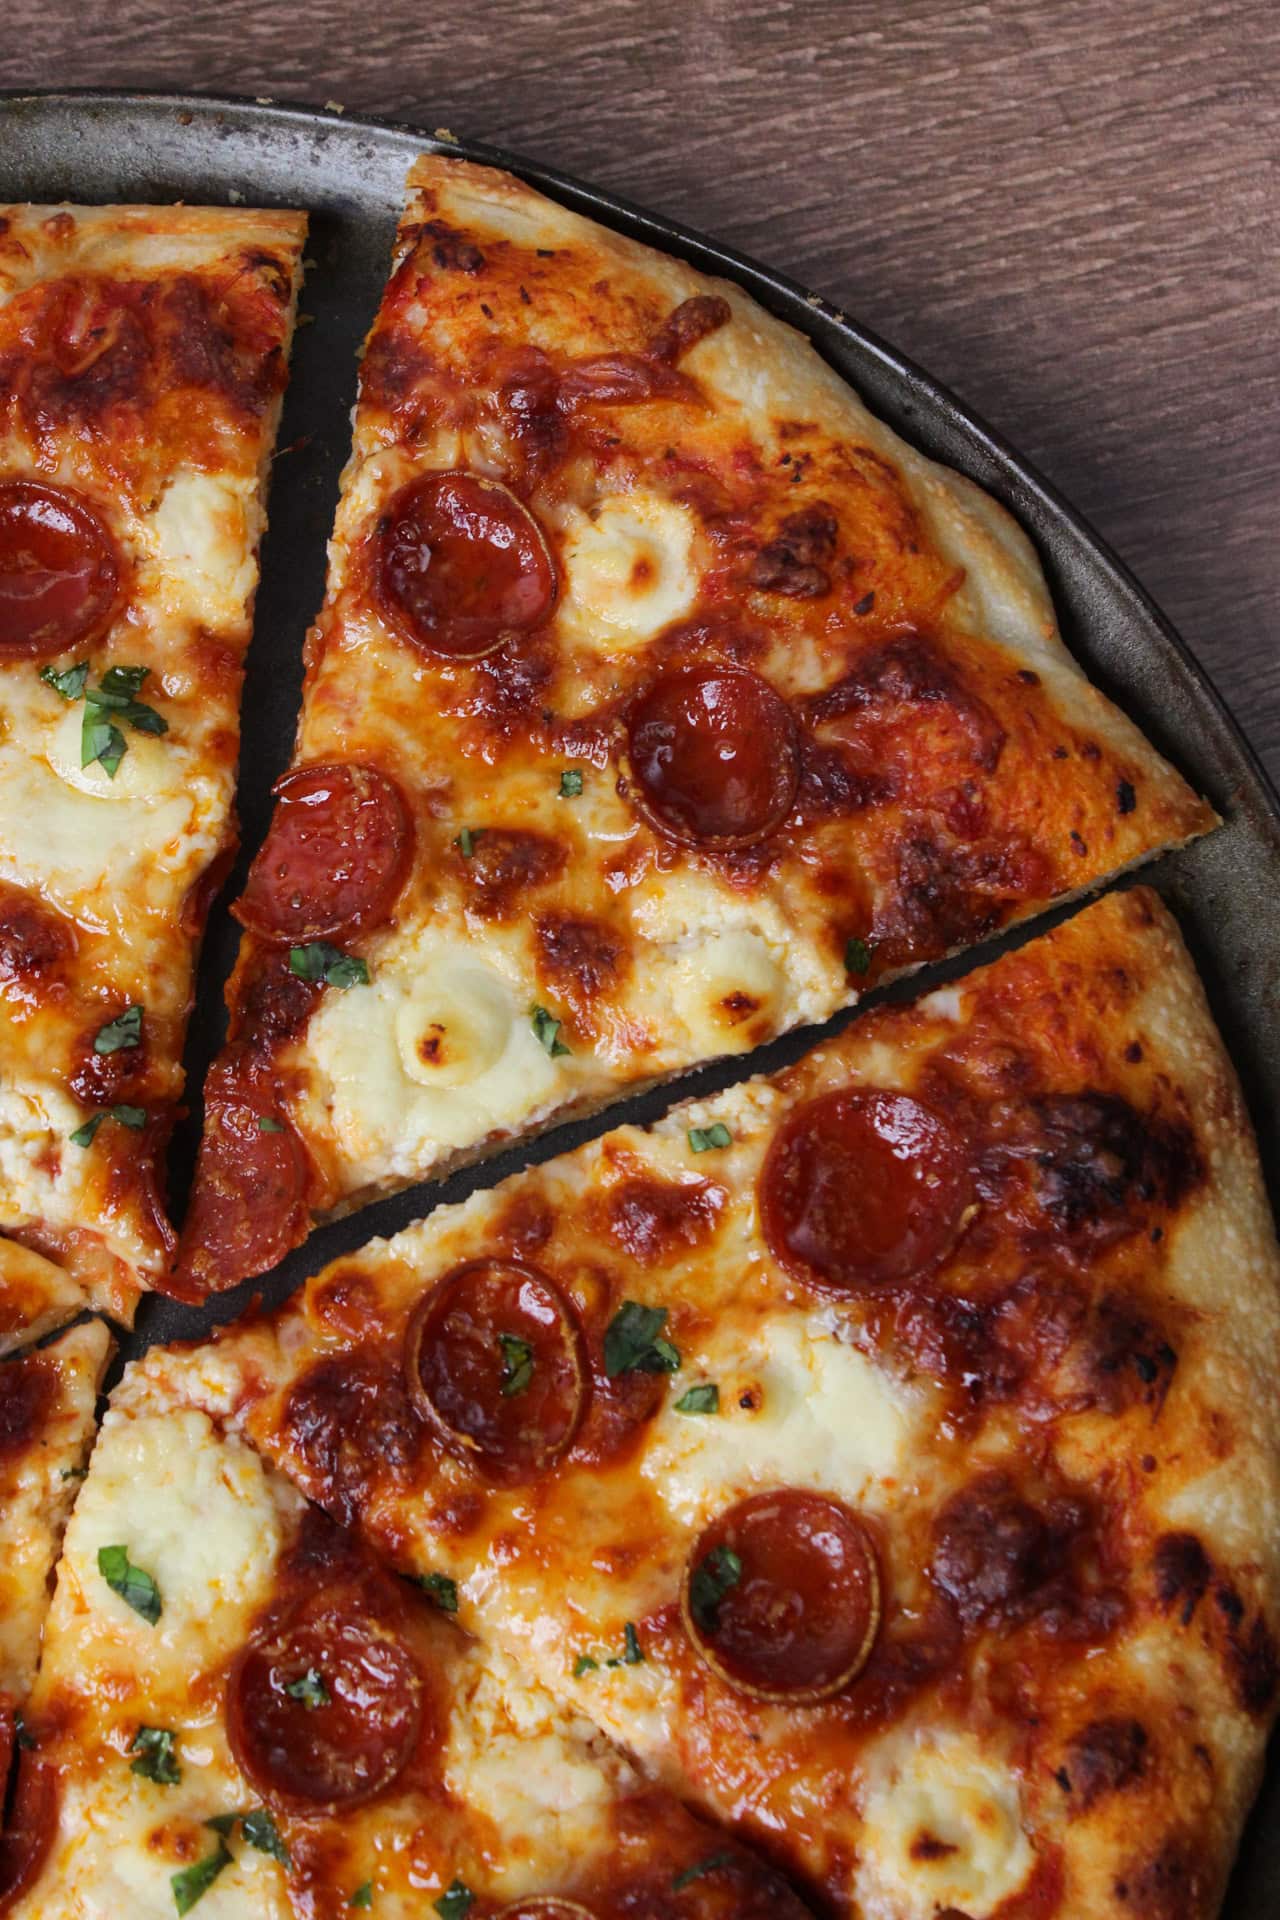
Our sweet, savory, and spicy pepperoni pizza with ricotta and hot honey is a surefire way to shake up Friday night pizza dinner! Not only is this pizza super fun to make, but it’s also so simple that you won’t believe how flavorful it is. It tastes like something you’d find at a gourmet pizza restaurant – even though it’s just a pepperoni pizza dressed up with a few special ingredients.
Try our recipe for hot honey pepperoni pizza with ricotta and don’t forget to leave a rating and a comment to let us know what you think!
Hot Honey Pepperoni Pizza FAQs
Related Date Night Pizza Recipes
Love this recipe? You may enjoy these recipes, too:


Tell us what you think!
We hope you enjoy this recipe! When you try it out, please leave a review and a star rating in the comments below. Happy cooking! – Nicole and Alex
Hot Honey Pepperoni Pizza with Ricotta
Save this recipe!
Ingredients
New York Style Thin Crust Pizza Dough (adapted)
- ¾ cup warm water about 105 degrees F
- 1½ cups bread flour
- 0.125 ounces active dry yeast
- ¾ teaspoon granulated sugar
- ¾ teaspoon salt
- 1 tablespoon extra virgin olive oil plus ½ teaspoon for coating
Pizza Toppings
- ½ cup pizza sauce
- 4 ounces shredded mozzarella
- 1 ounce pepperoni
- 1 teaspoon grated parmesan cheese
- 1 pinch sea salt
- 3 ounces ricotta cheese
- ½ to 1 teaspoon hot honey
- 2 to 3 leaves fresh basil finely chopped
Instructions
New York Style Thin Crust Pizza Dough (adapted)
- Add warm water and bread flour to the bowl of a stand mixer. Gently combine using your hands (wet them first to prevent sticking) and let sit for 20 to 30 minutes.
- Next, add the yeast, sugar, salt, and extra virgin olive oil to the dough. Mix until combined, using your hands (wet them again to prevent sticking) or the paddle attachment of a stand mixer on low speed. Then, let the dough rest for another 30 minutes.
- Next, use the dough hook attachment on the stand mixer to knead the dough on low speed for about 10 minutes. You may have to coax the dough off the hook every few minutes (turn the mixer off first!) if it gets stuck.
- Once the dough is soft and resilient, roughly shape it into a ball. Coat the inside of a second bowl with about a half teaspoon of olive oil, then transfer the dough ball to this bowl. Roll the dough around so that it gets evenly coated in olive oil, then cover the bowl tightly with plastic wrap. Refrigerate for 24 to 48 hours.
Assemble & Bake
- Remove the pizza dough from the fridge about an hour before you want to bake it, so that it warms up to room temperature. In the meantime, preheat the oven to 500 degrees F.
- Next, prepare your toppings. If you're making homemade hot honey (see Notes section below), whisk together and set aside. Then, make a piping bag for the ricotta:Fill a small plastic bag with the ricotta, pushing it down towards one corner of the bag. Then, twist the opposite corner to lightly seal the cheese in the bag. Using a pair of kitchen shears, snip about a quarter inch off of the corner of the bag with the cheese so that you can pipe the ricotta out onto the pizza. Set aside.
- Once the dough has warmed up, stretch it to fit the pizza pan. Here's how:Generously flour a clean work surface and your hands, and lightly dust the pizza pan and the top surface of the dough with flour. Carefully pick the dough up out of its bowl and transfer it to the work surface. Now, slowly and gently use your fingers to spread the dough out into a circular shape on the work surface – be careful so as not to pop any of the air bubbles trapped in the dough. Since this dough has a higher hydration level, it will want to spread out naturally, so shaping should be fairly easy.Then, transfer the dough onto the prepared pan and gently finish shaping it into a 12 to 14 inch round to fill the pan.
- Next, add the toppings. Spread the pizza sauce evenly over the dough, leaving about a quarter- to a half-inch of space around the edges for the crust. Sprinkle evenly with mozzarella cheese, add the pepperoni, then sprinkle with grated parmesan and a pinch of salt. Then, pipe the ricotta into small dollops (about a half-inch tall) spaced out evenly across the pizza.
- Bake for about 10 to 15 minutes, until the mozzarella is bubbly and browned and the ricotta is lightly browned on top.While the pizza is in the oven, finely chop a few fresh basil leaves for finishing the pizza. You don’t want to do this step too early, as the basil will oxidize (turn brown) the longer it sits after chopping.
- Finally, top the pizza with a drizzle of hot honey and the fresh basil. Slice and serve hot!
Notes
Nutrition
If you have any questions regarding the information presented in this post, please refer to our Nutrition Disclaimer here.
Pepperoni pizza is my favorite type of pizza. But sometimes I love changing it up a little bit. Ricotta and Hot Honey are great ways to do just that! I love how the different flavors all come together in this recipe.